Your downstem just cracked. You don’t want to wait a week for shipping. What do you do? After 12 years in this business, I’ve seen every hack, every shortcut, and every failed experiment. Let me show you four ways to make a glass downstem at home – from “I-need-it-now” simple to “I-want-to-learn-glassblowing” advanced.
To make a glass downstem at home, you can use a glass dropper with the bulb removed, cut and sand a glass tube from a hardware store, or flame-work borosilicate tubing with a torch. Each method requires different tools – but all can produce a functional downstem in under an hour.
I still remember 2016 – sitting in my Shenzhen factory, watching our veteran glassblowers shape 500 downstems by hand. One of them, Master Chen (22 years at the torch), laughed at me when I asked if DIY downstems were possible. “Frank,” he said in Mandarin, “a beginner with a torch is like a monkey with a knife. Possible – but expect blood.” That stuck with me. And it’s why safety is woven into every step I’ll show you.
Contents
- 0.1 Why Make Your Own Downstem Instead of Buying One?
- 0.2 Safety First – Read This Before Touching Any Glass
- 0.3 Method 1 – Glass Dropper Downstem (Easiest for Beginners)
- 0.4 Method 2 – Hardware Store Glass Tube Downstem (No Torch Needed)
- 0.5 Method 3 – Borosilicate Tubing with a Torch (The “Real” Way)
- 0.6 Method 4 – Emergency Metal Tube Downstem (Temporary Fix)
- 0.7 How to Measure and Install Your DIY Downstem
- 0.8 Why CloverGlass Still Makes More Sense for Most People
- 0.9 Final Word – When to DIY and When to Buy
- 1 FAQ
Why Make Your Own Downstem Instead of Buying One?
A cracked downstem ruins your whole night. DIY gets you smoking again in 30 minutes – but only if you do it safely. The real reason to DIY is speed and customization, not durability. Factory-made borosilicate downstems last 10x longer than any homemade version.
Let me be completely honest with you. I’ve shipped over $1M in glass inventory, and I know exactly what I’m talking about. Homemade downstems have one advantage: they’re right now. You break your stem on a Friday night? You don’t want to wait for shipping. I get it.
But here’s the truth from someone who sees 500+ replacement orders a month from our LA warehouse: homemade downstems are temporary fixes. They break faster. They seal worse. They often deliver smoke that’s hotter and harsher than you want.
So why am I writing this guide? Because I’ve been there myself. And because sometimes you just need a fix right now – and that’s honestly totally fine.
Who DIY downstems are good for:
- You broke a stem and can’t wait for shipping
- You want to customize your own length or diffuser style
- You’re curious about glass crafting (respect – it’s a beautiful craft)
Who should just buy a replacement (like from cloverglasspipe.com):
- You want a stem that lasts longer than 2–3 months
- You need proper airtight seals (no smoke leaking)
- You want borosilicate glass that handles heat without cracking
Most DIY methods below use soda-lime glass – the same stuff as drinking glasses. It works for a few weeks, then heat cycles cause hairline cracks. Factory downstems use borosilicate, which expands 3x less under heat and costs pennies when you buy wholesale.
But you’re here for the DIY. So let’s get to work.
Safety First – Read This Before Touching Any Glass
Glass dust is permanent lung damage. Hot glass looks exactly like cold glass – until you grab it. Wear safety goggles, work under running water when cutting or drilling, and let glass cool for 5 full minutes before touching. Broken glass shards hide everywhere.
I’m not being dramatic. I’ve seen it. One guy in our LA warehouse rushed a repair job and sent himself to the ER with a sliced finger tendon. Another inhaled glass dust for a week straight – coughing for months after.
Before you start any method, check these boxes:
- [ ] Safety goggles – not sunglasses, not reading glasses
- [ ] Heavy gloves (kitchen or work gloves are fine)
- [ ] Container of water for cooling glass during cutting
- [ ] Trash bag double-lined for broken glass disposal
- [ ] First aid kit nearby with tweezers and antiseptic
Hot glass warning: When you torch glass (even with a lighter), it can reach 1000°F+. It looks exactly the same as cold glass. There’s no color change. Always test by hovering your hand near the glass – if you feel heat, don’t touch.
Broken glass disposal: Wrap shards in newspaper or paper towels, seal in a plastic bag, then put that in another bag. Write “BROKEN GLASS” on it. Not because of rules – because your trash collector deserves to keep their fingers.
Alright – safety covered. Let’s make a downstem.
Method 1 – Glass Dropper Downstem (Easiest for Beginners)
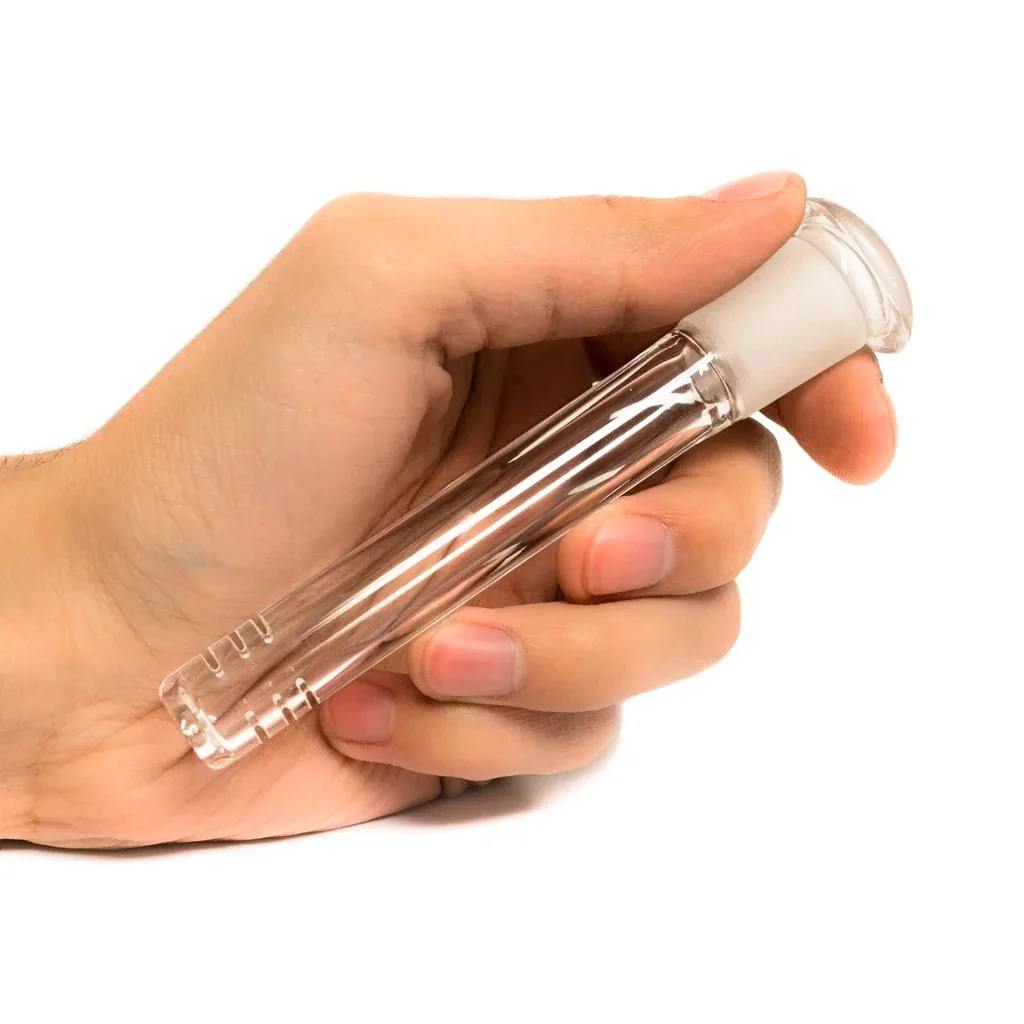
Take an eye dropper or glass pipette from an empty tincture bottle. Remove the rubber bulb with scissors. The glass tube is already the perfect shape – just trim to length using a glass cutter or a notched metal file. Smooth the cut edge with sandpaper, and you’re done in 10 minutes.
This method is how I made my first downstem back in 2013. I had a broken downstem, a glass dropper from an old CBD tincture, and absolutely no patience. Ten minutes later, I was smoking again.
What you need:
- Glass dropper or pipette (from any empty bottle – essential oils, tinctures, e-juice)
- Glass cutting tool or a triangular file
- Sandpaper (150 grit, then 400 grit)
- Running water
Steps:
Remove the rubber bulb. Cut it off with scissors or pull it off. Wash the glass tube thoroughly – any residue from the original contents will taste terrible.
Measure the length you need. Hold the dropper next to your bong’s female joint. Mark where it should end – you want the tip to sit about 10–20mm below the water’s surface, not touching the bottom.
Score the glass. Use your glass cutting tool to score a single line around the tube at your mark. One firm pass – not multiple scratches. Multiple passes create weak spots.
Snap it. Hold the tube with both hands, thumbs opposite the score line, and snap with a quick, firm motion. Most droppers snap cleanly. If not, run warm water over the score line first – heat helps.
Sand the cut edges. Run the cut end under water while sanding. Start with 150 grit to knock off sharp edges, then 400 grit to smooth. The rim should feel smooth against your lip – that’s the test.
Test fit. Insert into your bong’s joint. It should sit snug but not forced. If it wobbles, wrap a thin strip of electrical tape around the joint end for a temporary seal.
⏱️ Time: 10–15 minutes
🛠️ Difficulty: Beginner (1/5)
💰 Cost: $0 (use what you have)
⏳ Lifespan: 2–4 weeks of regular use
Real talk from Frank: This is a true emergency fix. The soda-lime glass in droppers cracks fast under heat. I’ve done this myself – got about three weeks before hairline cracks appeared. It’s a band-aid, not a replacement.
Method 2 – Hardware Store Glass Tube Downstem (No Torch Needed)
Buy 6mm or 8mm glass tubing from a hardware store or hobby shop. Cut to length with a glass cutter – follow the same score-and-snap method. Use a rubber grommet (from any hardware store) to seal the joint. The tip won’t be flared like a real downstem, but it will work.
This method gives you a much cleaner result than the dropper trick. The tubing is fresh, the cuts are cleaner, and the rubber grommet creates an actual seal.
What you need:
- Glass tubing (6mm or 8mm diameter – hardware store “glass rod” section or Amazon)
- Glass cutting tool (under $10 at any hobby store)
- Sandpaper (150 and 400 grit)
- Rubber grommet – the exact size for your bong’s joint (14mm grommet for 14mm joint, etc.)
- Measuring tape or ruler
- Running water
Where to find glass tubing:
- Local hardware store – ask for “glass rod” or “glass tubing.” Some carry it; keep asking.
- Hobby/craft store – Michael’s, Hobby Lobby, etc. Look in stained glass supplies.
- Amazon – search “glass tubing for crafts.” Get borosilicate if you can find it.
Steps:
Measure your needed length. Use the pencil method from the measurement section earlier – insert a pencil into your bong’s joint, mark at the top, measure from tip to mark. That’s your length.
Mark the glass tube. Use a marker to mark your cut line. Add 5mm extra if you’re nervous – you can always sand more off.
Score under water. Run the glass cutting tool along the mark while keeping the tube under running water. The water keeps glass dust down and prevents overheating.
Snap the tube. Place the score line over a hard edge (table corner works). Press down firmly on both sides of the tube. Snap.
Sand the edges. This is critical. Run the cut end under water and sand until smooth. Test sharpness by dragging your fingernail across – if it catches, sand more.
Install the grommet. Push the rubber grommet into your bong’s joint. Wet it slightly for easier insertion.
Insert the tube. Slide your glass tube into the grommet. It should fit snug but not tight. If it slips, a tiny piece of electrical tape on the tube adds friction.
⏱️ Time: 20–30 minutes
🛠️ Difficulty: Easy (2/5)
💰 Cost: $5–15
⏳ Lifespan: 1–3 months
What’s missing? Real downstems have flared tops that lock into female joints and create an airtight seal. Your DIY tube won’t have that – which means smoke can leak, and the stem can slide out. The rubber grommet helps, but it’s not perfect.
Upgrade tip: If you have a torch, you can flame-polish the cut edge. Heat the sanded end until it glows slightly, then let it cool. This melts the sharp edges smooth and reduces crack risk.
Wholesale buyers reading this: This is why our customers come back. A real borosilicate downstem with proper joints costs $3–8 wholesale from our LA warehouse. The DIY version above costs $5–15 in materials and lasts a fraction of the time. You do the math.
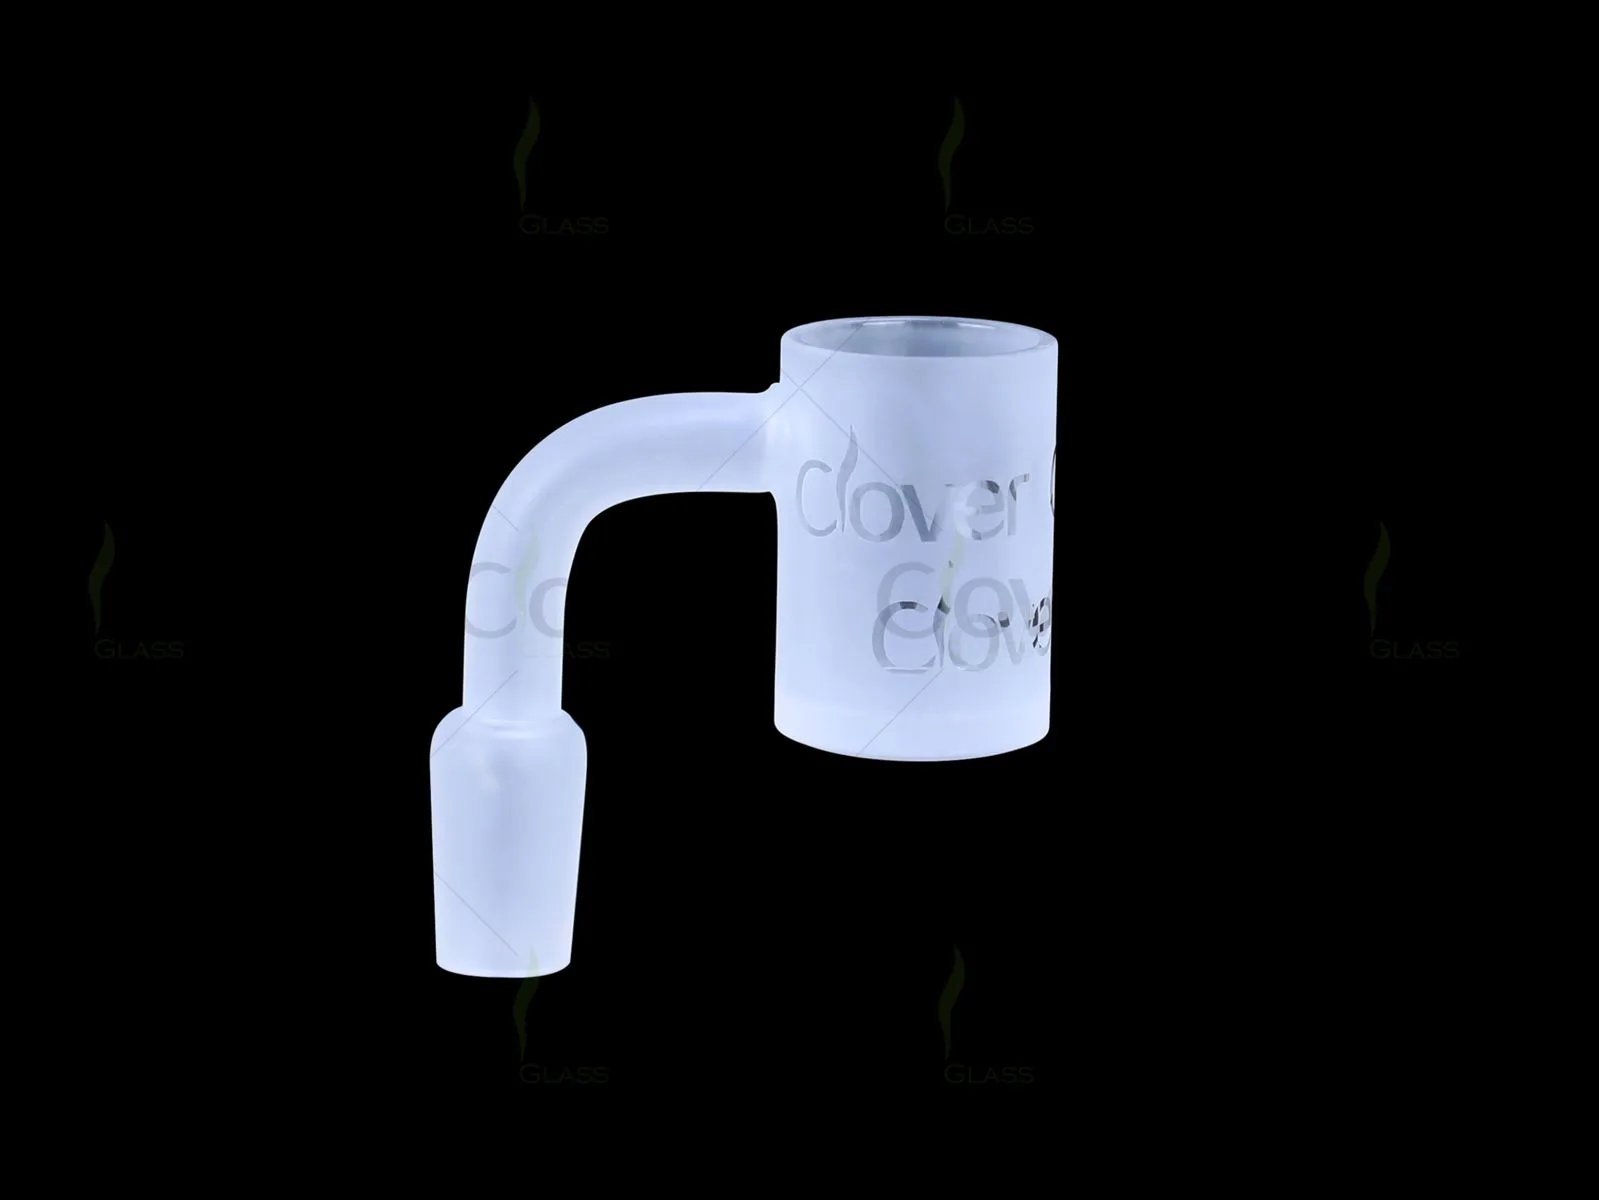
Method 3 – Borosilicate Tubing with a Torch (The “Real” Way)
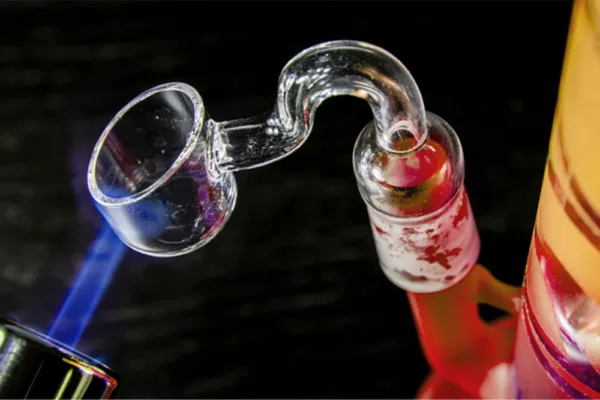
This is how I watched Master Chen do it: heat borosilicate tubing in a propane or MAP gas torch until it glows orange (not red – you’ll learn the difference), then shape with graphite tools. The key is constant rotation – spin the tube like you’re rolling a pencil. After shaping, anneal in vermiculite or a heated sand bath to relieve internal stresses.
Let me be clear: This is not a beginner project. You need a torch that hits at least 1000°F (propane does it, but cheaper torches struggle). You need patience. You need steady hands. But the results? A real, flared glass downstem that fits your bong perfectly.
What you need:
- Borosilicate glass tubing – 12mm outer diameter, 8–10mm inner diameter
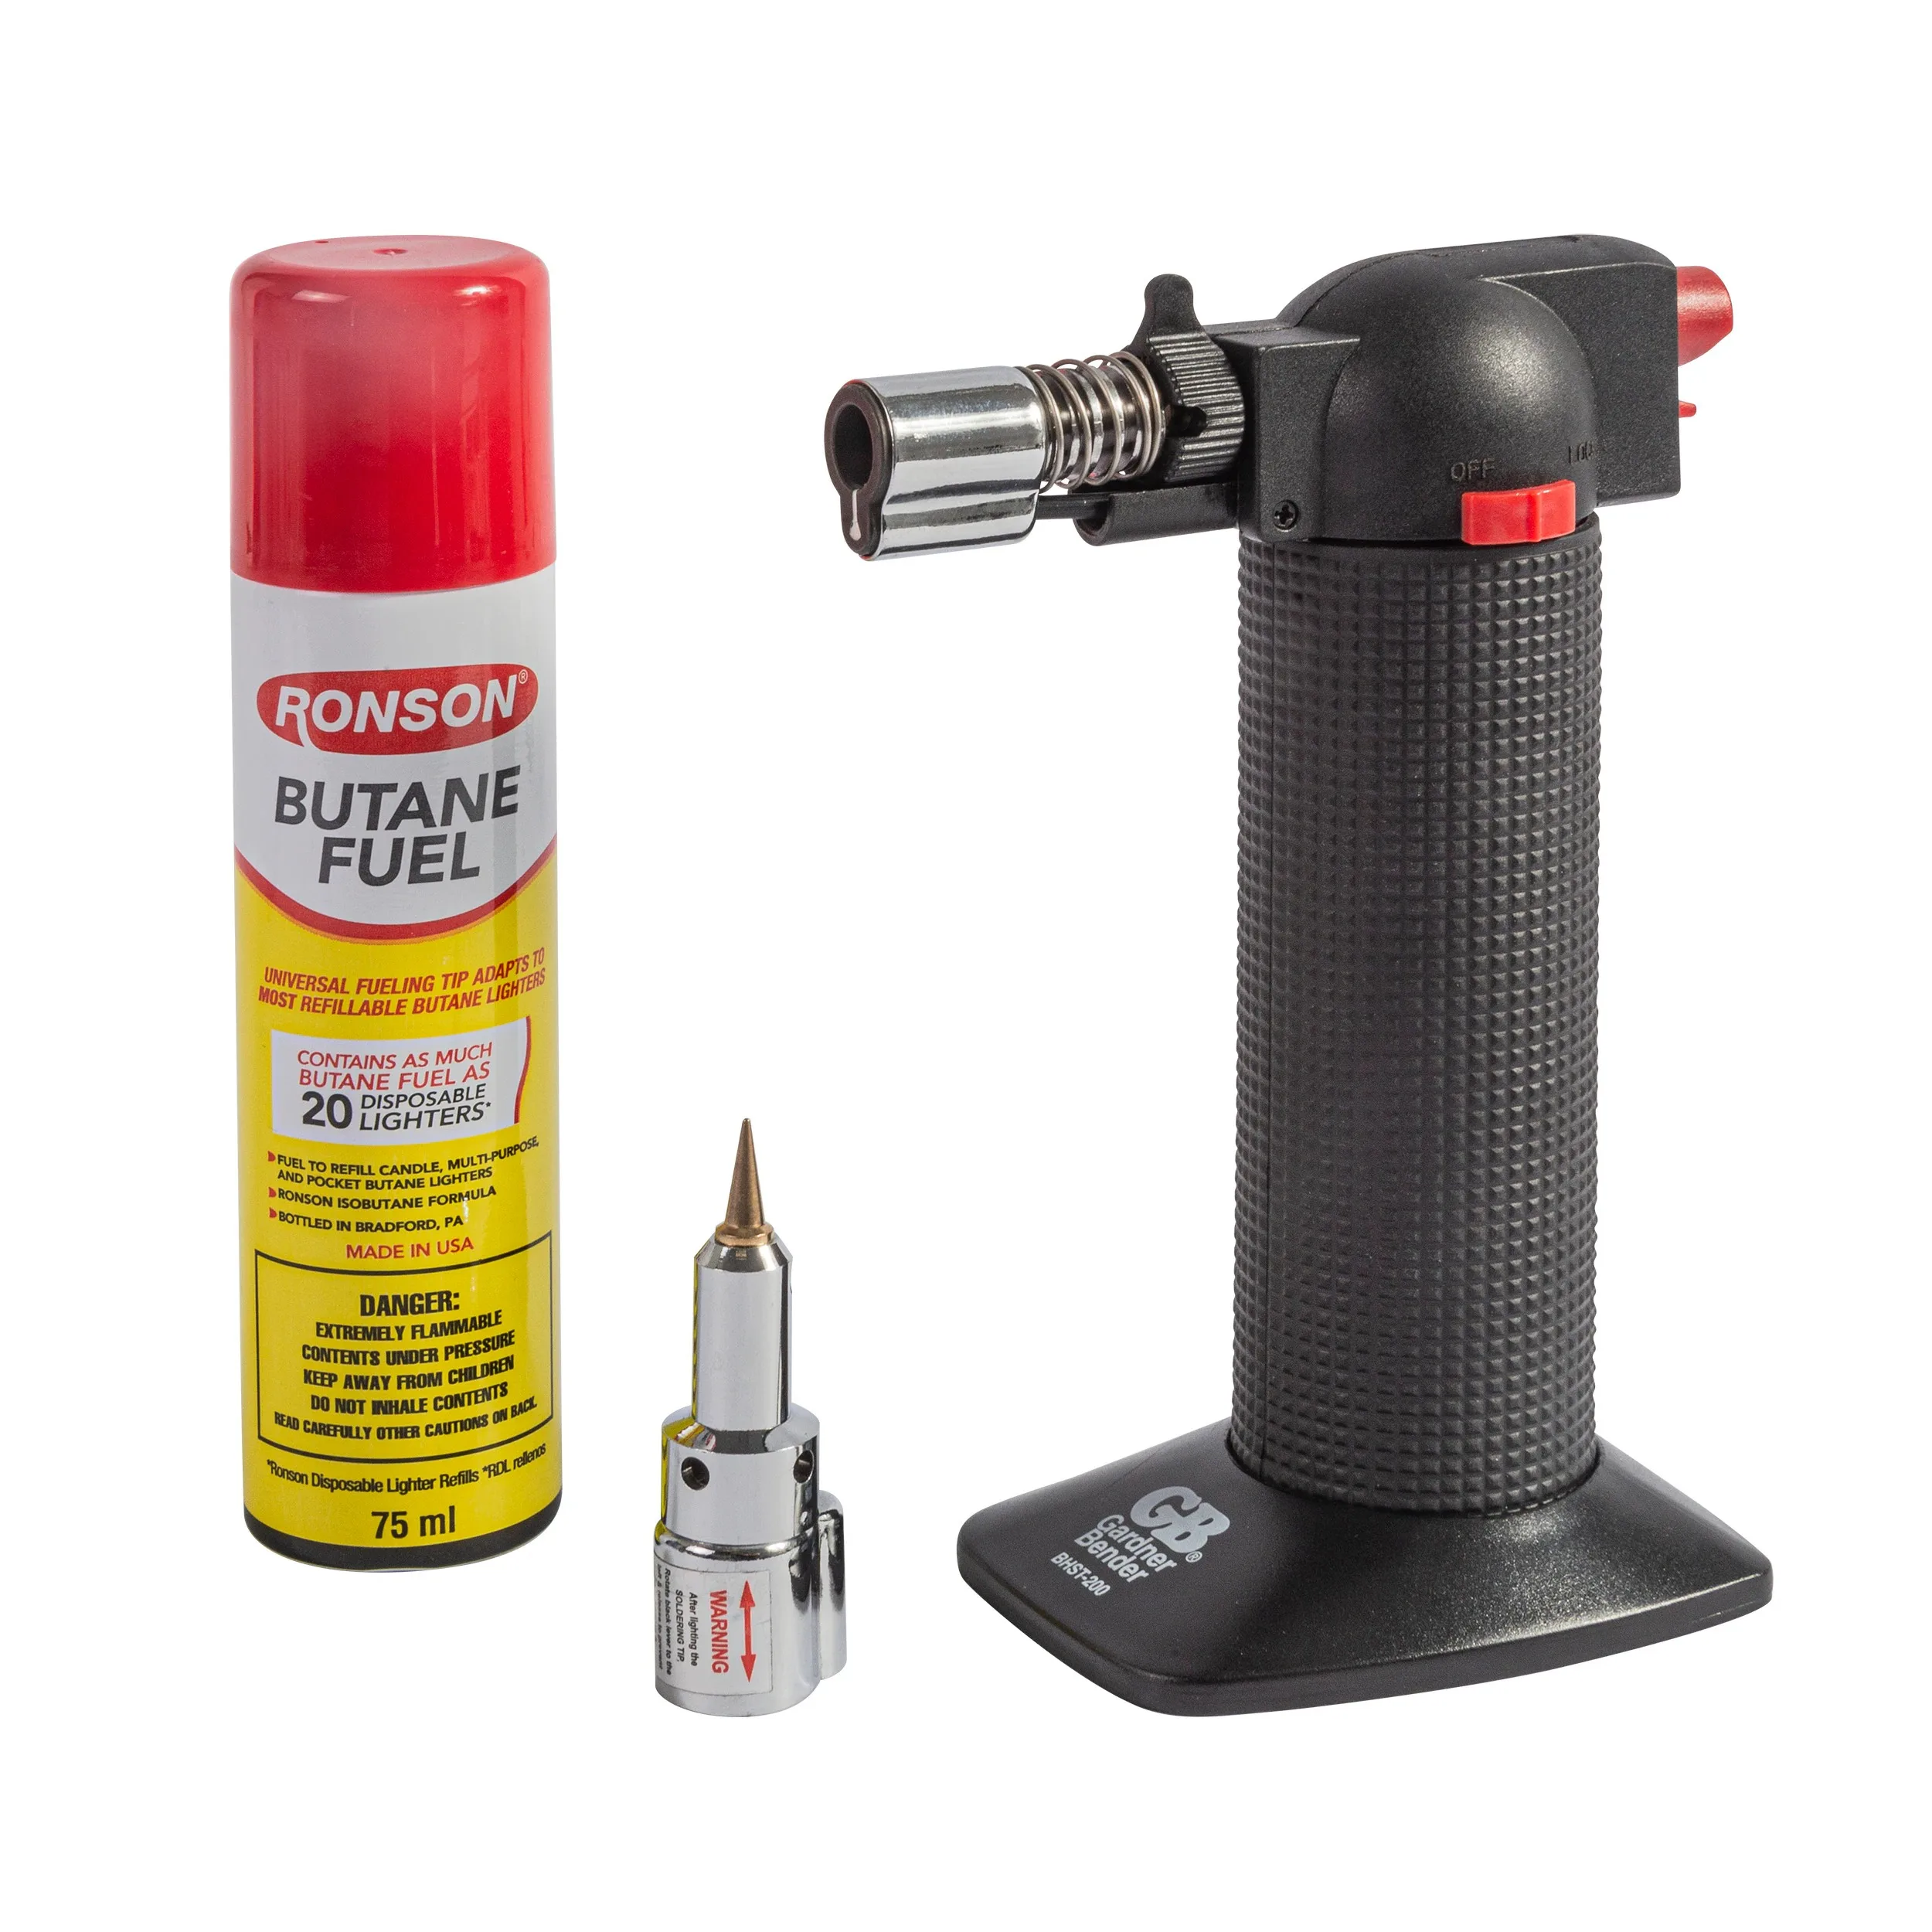
- Propane or MAP gas torch ($30–60 at hardware stores)
- Graphite shaping tool or metal rod
- Kevlar or heatproof gloves
- Vermiculite (garden section at hardware store) – for annealing
- Safety goggles (darkened if possible; regular okay)
- Fireproof surface (ceramic tile, brick, or firebrick)
- Metal bucket filled with vermiculite for annealing
Borosilicate vs. soda lime: Borosilicate (Pyrex) handles rapid temperature changes without cracking. Soda lime (drinking glasses) cracks under torch heat. If you’re doing this method, buy real borosilicate tubing. Look for “boro” or “Pyrex” labels. It costs more – about $15–25 for a 12-inch tube – but it won’t explode on you.
Step-by-step process:
Step 1 – Set up your workspace.
Place your fireproof surface away from anything flammable – curtains, papers, carpet. Have your bucket of vermiculite ready (more on that below). Keep water nearby in case of flames (small flame only – never use water on a gas fire).
Step 2 – Measure and cut.
Measure and cut your tubing just like Method 2. The cut doesn’t need to be perfect – you’ll melt the ends smooth anyway. Sand roughly to remove sharp edges.
Step 3 – Heat the joint end.
Hold the tube at a 45° angle in the torch flame. Rotate constantly – spin it like a drill bit. You want the glass to glow orange, not white-hot, not dull red. Orange means ~1000–1200°F – perfect for shaping.
Step 4 – Shape the flare.
Once the end glows orange, press it gently against your graphite shaping tool at an angle while spinning. The glass should soften and “mushroom” outward slightly. Don’t press hard – let the heat do the work.
Step 5 – Create the diffuser slits (optional).
While the tip is hot, use your graphite tool to press 3–4 small notches into the end. Or skip this – many DIYers just leave it open. Diffuser slits improve filtration but also weaken the tip. Trade-off.
Step 6 – Anneal (THIS IS CRITICAL).
Without annealing, your downstem will crack within days – often after you think it’s safe. Here’s the at-home method:
- Heat the entire downstem evenly in the torch flame for 60 seconds
- Immediately plunge into a bucket of vermiculite (a lightweight, heat-resistant mineral used in gardening)
- Bury it completely. Vermiculite holds heat and cools the glass slowly – like a poor man’s kiln
- Leave for 2–4 hours, or overnight for best results
If you don’t have vermiculite: Sifted sand in a metal bucket works too, but not as well. The key is slow cooling – at least 30 minutes before you even touch it.
Step 7 – Cool and inspect.
After 2+ hours, the glass should be cool enough to touch (test by hovering your hand over the vermiculite – if you feel heat, wait). Remove and inspect for cracks. Shine a light through – cracks show as white lines against the light.
⏱️ Time: 60–90 minutes + 2 hours annealing
🛠️ Difficulty: Advanced (4/5)
💰 Cost: $30–60 (torch + tubing + tools)
⏳ Lifespan: 3–6 months if annealed well
Why DIY torch downstems still crack faster than factory ones: Factory annealing uses temperature-controlled kilns that hold 900–1000°F for 1 hour per ¼ inch of thickness. Your vermiculite bucket is a guess. The internal stresses don’t fully release. That’s why even a good DIY boro downstem lasts only months, while our factory stems last years.
Flashback moment: Master Chen once showed me a box of his first 500 downstems – all cracked. “I thought I was good enough to skip the kiln,” he said. “I was wrong. You learn your lesson when you lose a whole week’s work.” I learned that lesson without paying the price – thanks to him.
Method 4 – Emergency Metal Tube Downstem (Temporary Fix)
This is the true “last resort” method. A stainless steel straw or brass tube from a hobby shop fits perfectly into most bong joints. Cut to length with a hacksaw, sand the edges smooth, and wrap the joint end with electrical tape for a seal. Metal won’t crack – but it overheats and can make smoke taste metallic.
I almost didn’t include this method. But I’ve gotten enough desperate emails to Frank@CloverPipe.com from people who broke a stem at 10pm on a Sunday to know that sometimes, any fix is better than no fix.
Used properly – and temporarily – a metal downstem is just fine.
Materials:
- Stainless steel straw (smoothie straws work perfectly – check Amazon or kitchen stores)
- Brass tubing (hobby shop in the model train section – ¼ inch or 6mm outer diameter)
- Hacksaw or metal cutting tool
- Sandpaper (120 and 220 grit)
- Electrical tape
Safety note: Never use aluminum, copper, or zinc. These metals off-gas when heated and can make you sick. Stainless steel and brass are safe. Copper is not – it oxidizes and releases toxic fumes.
Steps:
Cut to length – measure the same way as glass methods. Mark your cut line.
Cut the metal – use a hacksaw with fine teeth. Go slow to keep the cut straight.
Sand the cut edges – metal can be sharper than glass. Sand until completely smooth.
Install a grommet or tape – ideally use a rubber grommet from a hardware store. If not, wrap electrical tape around the joint end until it fits snug.
Test with cold water first – always test before heating. Does it fit snug? Does smoke pull easily?
⏱️ Time: 15 minutes
🛠️ Difficulty: Easy (2/5)
💰 Cost: $5–15
⏳ Lifespan: Weeks to months, but metal degrades taste
Why this is temporary: Metal conducts heat. Torch within an inch of a metal downstem, and your entire stem gets hot. That heat transfers to your bong’s joint = thermal stress on your glass. Enough cycles of this, and your bong joint cracks. Also – metal downstems taste bad after a few uses. Something about the heat + metal reaction.
Frank’s honest advice: This is a true “I am desperate and can’t get anything shipped for 5 days” last resort. Use it, then buy a real glass stem. Your future self will thank you.
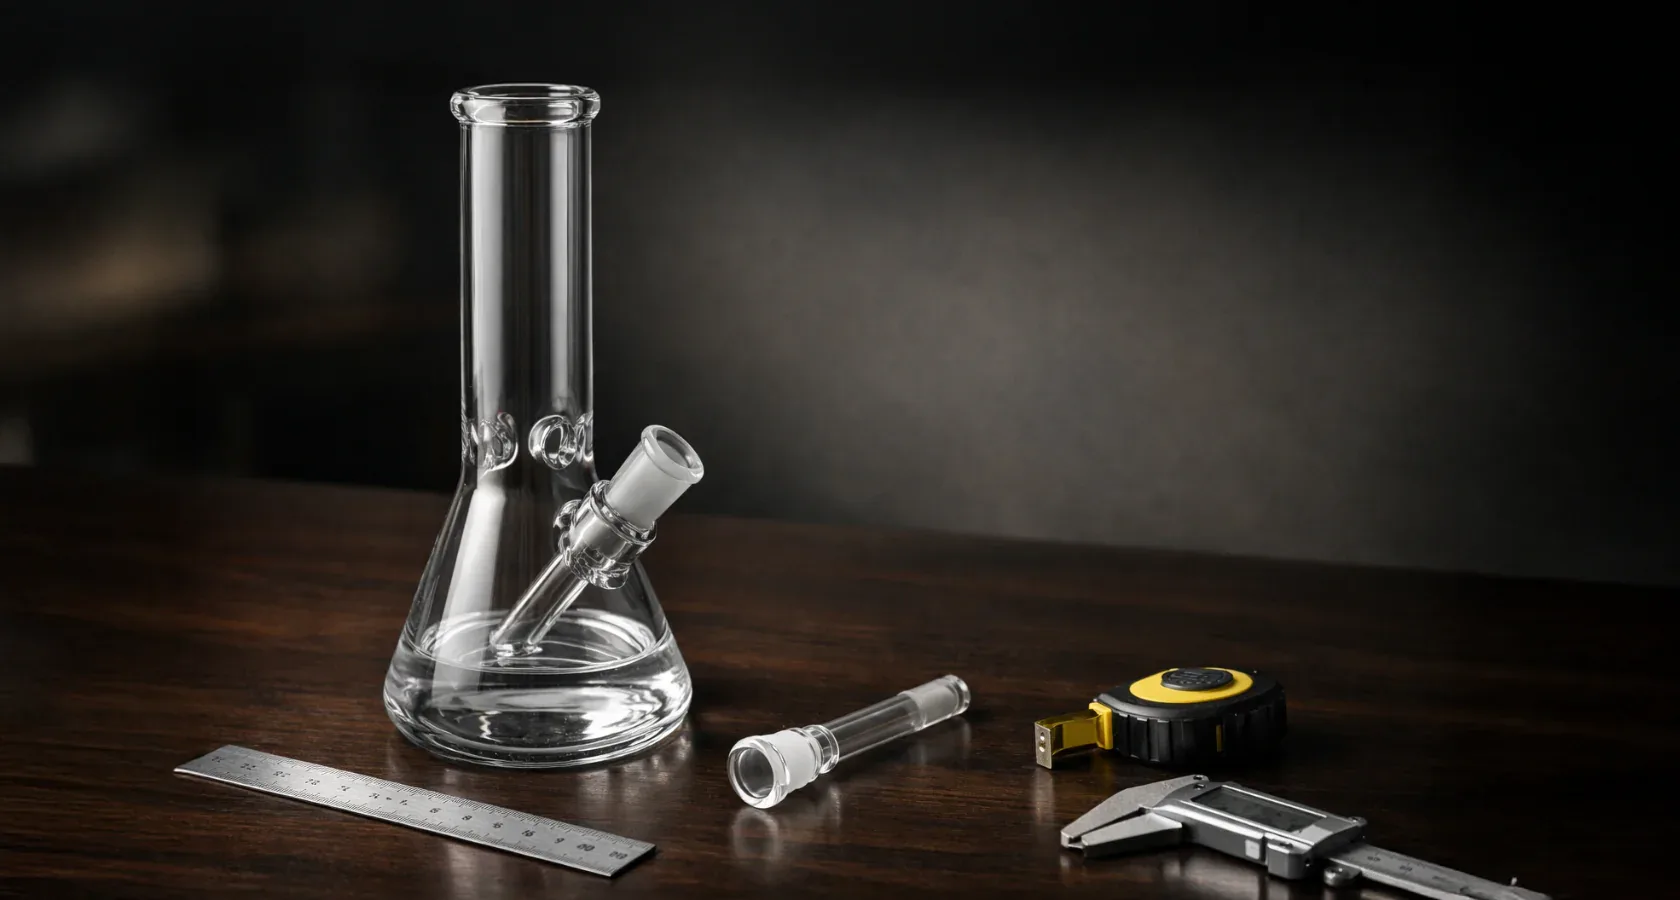
How to Measure and Install Your DIY Downstem
The pencil method is foolproof: insert a pencil into your bong’s female joint until it barely touches the opposite wall – less than half an inch from the bottom. Mark where the pencil exits the joint. Pull it out and measure from tip to mark. That is your perfect length.
Now that you’ve made a stem, you need it to fit perfectly. Let’s walk through the measurement process step by step.
Step 1 – Measure your length.
Grab any straight object – pencil, chopstick, straw. Insert it into the joint until it touches the bong’s interior wall (the base or the opposite side). Pull it back about ½ inch. Mark where the object exits the top of the joint. Pull it out. Measure from the tip to your mark. That’s your length.
Step 2 – Identify your joint size.
Standard sizes are 14mm and 18mm. Some mini rigs use 10mm.
Use the dime trick: Place a dime over the joint opening. If it sits exactly on top, you need a 14mm joint. If the dime falls into the joint, you need an 18mm. That simple.
Step 3 – Test fit your DIY stem.
Insert your homemade downstem. It should sit snug, with no wobble and no gaps visible. If you see light through a gap, smoke will leak out and air will leak in – ruining your hits.
If it wobbles: Add a rubber grommet at the joint, or wrap electrical tape around the joint end until it fits snugly.
If it won’t go in: Your stem is too wide. Sand or file the joint end down slightly. If it’s still too tight, you need a different diameter tube – go back to your materials.
If it’s too short: You should have measured before cutting. Now you need to start over. Sorry – this is why we measure twice.
If it’s too long: Sand the tip shorter. For glass, use sandpaper under running water. For metal, use a hacksaw again.
Step 4 – Water level check.
After installation, add water to your bong. The downstem tip should sit 10–20mm below the surface of the water – not touching the bottom, not above the water line.
Not bubbling? Stem is above water – add more water or shorten the tip.
Bubbles feel hard to pull? Stem is too deep – remove water or shorten the tip.
Matching joint size compatibility: Your downstem’s joint must match your bong’s female joint exactly – 14mm will not fit 18mm, and inserting wrong sizes can crack glass.
Why CloverGlass Still Makes More Sense for Most People
After reading all of these DIY methods, here’s the truth I’ve learned in 12 years of selling glass: DIY is a fun project and a great emergency fix, but factory-made downstems are stronger, safer, and often cheaper than buying all the tools and materials yourself to do it right.
Let’s do the math:
DIY with Method 2 (hardware store): $15 in materials + 30 minutes of your time = 1–3 months lifespan.
DIY with Method 3 (torch method): $50+ in tools + 2 hours + annealing = 3–6 months lifespan.
Buy from CloverGlass: $3–8 wholesale + 3–5 days shipping (from LA warehouse) = 12–24 months lifespan.
I’m not saying this to discourage your DIY spirit. I’m saying it because I’ve been on both sides of this transaction, and I know what actually works.
What we offer at CloverGlass (and why our 1200+ US wholesale clients buy from us):
- $1M+ inventory in LA – when you need a downstem, we ship same-day
- Borosilicate glass – thermal shock resistant, won’t crack from hot hits
- 20+ lengths in stock – 70mm to 180mm, every size you could need
- 14mm, 18mm, 45°, 90° – whatever your bong has, we have the matching stem
- Slit diffusers, hole diffusers, colored glass – actual filtration, not just a tube
- Free promo items on wholesale orders – grinders, stickers, silicone mats
- 100% customs guarantee – if detained or lost, we compensate fully
For individuals: Our online store launched Jan 1, 2026 at cloverglasspipe.com. Orders over $1200 unlock wholesale pricing. Products ship factory-direct.
For shop owners (B2B): Email Frank@CloverPipe.com. Request samples. Get a quote. I’ll be in the US 2–3 times this year – come visit our LA warehouse and see exactly what $1M in glass inventory looks like.
But I still love that you’re here for DIY. Honestly – if you’re reading a 2500-word guide on building your own downstem from a dropper or a blowtorch, you’re my kind of person. I built CloverGlass for people who care about how stuff works and want to make things themselves. And I always will.
Final Word – When to DIY and When to Buy
| Scenario | Recommendation |
|---|---|
| You broke a stem on Friday night and the shop is closed | DIY Method 1 (dropper) or Method 4 (metal) – get smoking tonight, replace on Monday |
| You want to learn glassblowing as a hobby | Method 3 (borosilicate + torch) – but accept that your first 5 stems will break |
| You need a stem that lasts longer than 3 months | Just buy one – seriously. Our stems cost $3–8 wholesale. It’s not worth the DIY |
| You’re a shop owner who needs 50+ stems | B2B wholesale from CloverGlass. Low MOQ, LA warehouse, custom packaging available |
Three CTAs:
- Get a wholesale quote – Email Frank@CloverPipe.com with your wishlist
- Order online – Visit cloverglasspipe.com (new online store – live Jan 1, 2026)
- Download our temperature chart PDF – Perfect for dab rig users wanting to optimize their hits
- Visit our LA warehouse – See $1M+ inventory and meet our team in person
Thanks for reading. Stay safe with your glass. And if you do build something amazing with these methods, send me a photo. Frank@CloverPipe.com – I’d love to see it.
FAQ
Q1: Can I make a glass downstem from a regular drinking straw?
No. Plastic melts under heat, releasing toxic fumes. Metal straws work temporarily (Method 4). Glass droppers work (Method 1). Plastic never.
Q2: What’s the easiest way to make a downstem without any tools?
Use a glass dropper with the rubber bulb removed (Method 1). Score it on a sharp table edge, snap, and smooth the cut on concrete or a sidewalk. Not ideal – but it works in a pinch.
Q3: Why do my DIY glass downstems keep cracking?
Most common reasons: no annealing (skipping slow cooling creates internal stresses), using soda lime glass instead of borosilicate, or cutting with too much force causing micro-fractures. Heat cycles exploit all three.
Q4: What torch do I need to make a glass downstem?
Propane torch at minimum – the same kind used for soldering pipes. Butane kitchen torches don’t get hot enough. MAP gas works better but costs more. For serious work, you want a dual-fuel torch from a glass supplier ($150–300).
Q5: Can I fire-polish a cut glass tube without a torch?
Yes – but you need very high heat. A gas stovetop is too weak. A propane torch is your only realistic home option. Some people use a 1500°F heat gun – jury’s out on whether that works well.
Q6: How do I make diffuser slits in a DIY downstem?
While the glass is hot and orange (Method 3), press a graphite rod or metal pick into the tip at angles. Or skip it – many DIY stems work fine as open tubes. Diffuser slits improve filtration by breaking smoke into smaller bubbles.
Q7: Is it safe to smoke from a metal downstem?
Yes, if you use stainless steel or brass. Never aluminum, copper, or zinc. Clean thoroughly before first use. Metal downstems heat up quickly – metal expands, glass expands differently – that’s why they’re not permanent fixes.
Q8: How do I measure a downstem length for a bong without removing the old one?
Pencil method: insert a pencil into the female joint until it barely touches the bottom or opposite wall. Mark where it exits the joint. Measure from tip to mark. Add ½ inch for water clearance.
Q9: What’s the difference between 14mm and 18mm downstems?
Diameter of the joint. 14mm fits smaller bongs and dab rigs – about the size of your pinky. 18mm fits larger bongs – index finger size. They are not interchangeable. Putting the wrong size in cracks glass.
Q10: How long does a homemade glass downstem last compared to a store-bought one?
Dropper method (Method 1): 2–4 weeks. Hardware store tube (Method 2): 1–3 months. Torch + boro + annealing (Method 3): 3–6 months. Factory borosilicate from CloverGlass: 12–24 months. The difference is annealing process and glass quality.