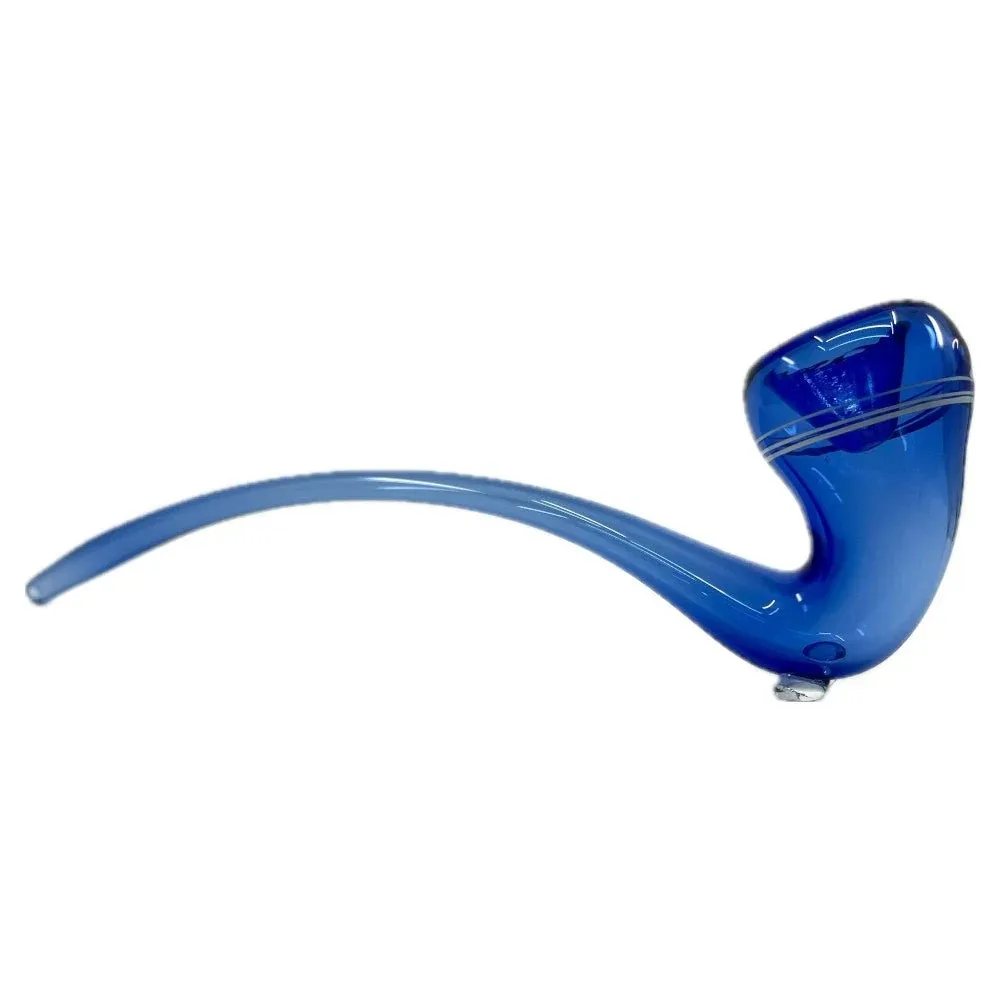
Sherlock pipes are elegant, functional, and timeless. With their curved neck and deep bowl, they’re a favorite among smokers and collectors alike. But have you ever wondered how they’re actually made? If you’re a glassblower, making a Sherlock pipe is a rewarding project that combines shaping, bending, and precision. If you’re not a glassblower, the process is fascinating – but it’s also dangerous and requires expensive equipment.
Making a Sherlock pipe involves shaping borosilicate glass tubing with a torch, forming the bowl, bending the neck into its signature curve, and annealing the finished piece in a kiln to prevent cracking. It requires a glassblowing torch, graphite tools, a bowl push, and a kiln. This is not a beginner project – it requires practice, skill, and proper safety gear. For most people, buying a finished Sherlock pipe from a wholesale supplier like CloverGlass is far safer and more cost-effective.
In this guide, we’ll walk you through the glassblowing process step by step, explain the tools and safety requirements, and discuss why buying is usually the smarter choice.
Contents
- 1 What Is a Sherlock Pipe?
- 2 Why Making a Sherlock Pipe Is a Skilled Craft
- 3 Tools and Materials You’ll Need
- 4 Step-by-Step: How to Make a Sherlock Pipe
- 5 Safety First – Critical Precautions
- 6 Why Most People Should Buy Instead
- 7 DIY Alternatives – What You Can Do Without a Torch
- 8 FAQ – Making Sherlock Pipes
- 9 Conclusion + CTA
What Is a Sherlock Pipe?
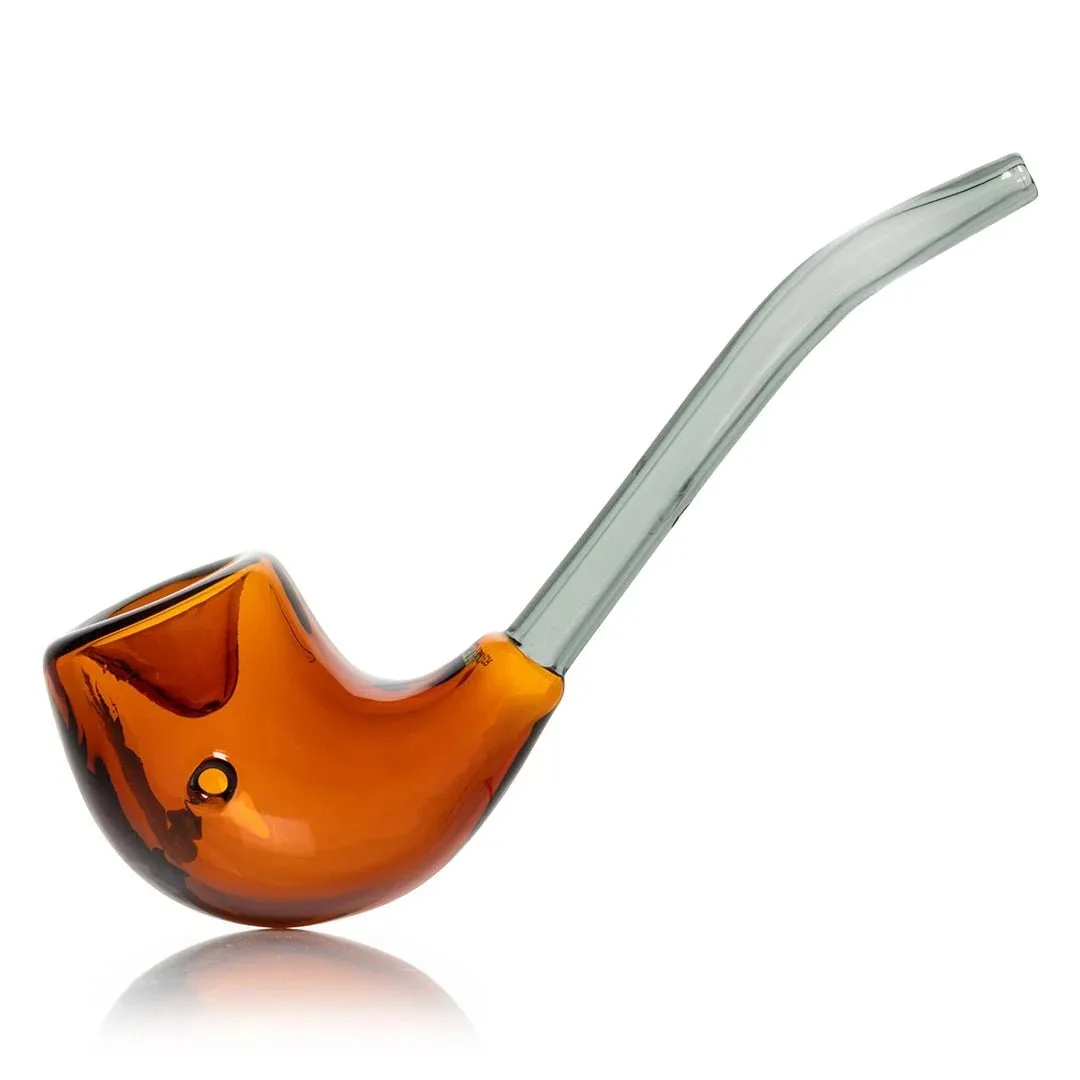
A Sherlock pipe is a smoking pipe with a distinctive curved neck and a deep bowl. Named after the fictional detective Sherlock Holmes, it’s known for its elegant appearance, comfortable grip, and smooth smoking experience. Sherlock pipes are typically made from borosilicate glass, though you can also find them in wood, silicone, and ceramic. The curved neck is the defining feature – it cools the smoke and keeps the bowl away from your face.
Why Making a Sherlock Pipe Is a Skilled Craft
Glassblowing is not a hobby you can pick up in an afternoon. Making a Sherlock pipe requires:
- Torch control – you need to heat the glass evenly without burning it or introducing bubbles
- Shaping skills – forming a bowl, bending a neck, and creating a mouthpiece all require practice
- Annealing knowledge – glass must be cooled slowly in a kiln to relieve internal stress
- Safety awareness – molten glass, open flames, and toxic fumes are all part of the process
A skilled glassblower can make a Sherlock pipe in 15–30 minutes. A beginner will struggle for hours – if they don’t give up first.
Tools and Materials You’ll Need
| Tool / Material | Purpose |
|---|---|
| Borosilicate glass tubing (e.g., 25mm heavy wall) | The main body of the pipe |
| Glassblowing torch (e.g., GTT or Carlisle) | To melt and shape the glass |
| Graphite paddle | For shaping and flattening |
| Bowl push (graphite or brass) | To form the bowl |
| Tweezers / mashers | For shaping the mouthpiece and carb |
| Diamond shears | For cutting glass |
| Kiln | For annealing the finished pipe |
| Didymium safety glasses | To protect your eyes from the bright flame |
| Heat-resistant gloves | To protect your hands |
| Proper ventilation | To remove fumes |
You’ll also need a well-ventilated workspace, a fireproof surface, and a first aid kit nearby.
Step-by-Step: How to Make a Sherlock Pipe
This is a simplified overview. Actual glassblowing requires hands-on training and practice.
Step 1 – Prepare the Tubing
Cut a length of borosilicate tubing (about 6–8 inches for a standard Sherlock). Fire-polish the ends to remove sharp edges.
Step 2 – Form the Bowl
Heat the center of the tubing until it’s soft. Use a bowl push to create an indentation – this will become the bowl. Rotate the tubing constantly to keep the shape even.
Step 3 – Shape the Neck
Heat the tubing near one end and begin bending it into the classic Sherlock curve. Use a graphite paddle to support the glass and keep the bend smooth. Don’t force it – let the heat do the work.
Step 4 – Create the Mouthpiece
Heat the other end of the tubing and shape it into a comfortable mouthpiece. You can flare it slightly or leave it straight.
Step 5 – Add the Carb
Use a small graphite pick or tungsten pick to poke a carb hole near the bowl. This takes precision – too big and the pipe won’t hit right; too small and it’s useless.
Step 6 – Anneal the Pipe
This is the most important step. Place the finished pipe in a kiln and bring it up to annealing temperature (around 1050°F / 565°C). Hold it there for 30–60 minutes, then cool it slowly. If you skip this step, the pipe will crack.
Step 7 – Final Inspection
Once cooled, inspect the pipe for cracks, sharp edges, or uneven walls. Test the airflow by drawing through the mouthpiece.
Safety First – Critical Precautions
Glassblowing is dangerous. You are working with:
- Molten glass – can cause severe burns
- Open flame – torch temperatures exceed 2000°F
- Toxic fumes – from burning glass and any colorants
- Sharp glass – broken pieces can cut deeply
You must:
- Wear didymium safety glasses at all times
- Work in a well-ventilated area – ideally with an exhaust hood
- Keep a fire extinguisher nearby
- Never touch hot glass with bare hands
- Take a proper glassblowing class before attempting this at home
Why Most People Should Buy Instead
Making a Sherlock pipe is a beautiful craft – but it’s not for everyone. Here’s why buying is the smarter choice for most people:
- Cost – A glassblowing setup costs $1,000–$3,000+. A finished Sherlock pipe costs $15–$60.
- Skill – It takes months or years to master. Your first attempts will be cracked, misshapen, or unusable.
- Safety – The risk of burns, cuts, and inhalation is real.
- Time – A skilled glassblower makes one in 20 minutes. A beginner might spend hours and still fail.
- Quality – Professionally made pipes are annealed properly, shaped cleanly, and built to last.
For smoke shop owners, buying wholesale from a supplier like CloverGlass is the only practical option. You get consistent quality, low MOQs, and fast shipping – without the risk and overhead of making them yourself.
DIY Alternatives – What You Can Do Without a Torch
If you’re not ready to invest in glassblowing equipment, here are some alternatives:
- Buy a Sherlock pipe kit – Some suppliers sell pre-made Sherlock bowls and stems that you assemble. This is not “making from scratch,” but it’s a low-risk way to get a custom pipe.
- Use a wooden Sherlock pipe – Wooden pipes are easier to carve and don’t require a torch. You can shape a Sherlock-style pipe from hardwood with hand tools.
- 3D print a mold – Some hobbyists 3D print molds for glass slumping, but this is experimental and not for beginners.
- Buy wholesale and customize – CloverGlass offers custom engraving and color options on Sherlock pipes. You get a custom piece without the dangerous work.
FAQ – Making Sherlock Pipes
Q1: Can I make a Sherlock pipe at home without a torch?
A: No – making a glass Sherlock pipe requires a glassblowing torch, proper tools, and a kiln. Without these, you can’t shape or anneal the glass.
Q2: How long does it take to make a Sherlock pipe?
A: A skilled glassblower can make one in 15–30 minutes. Beginners take much longer and often fail.
Q3: What type of glass is used for Sherlock pipes?
A: Borosilicate glass (e.g., Pyrex) is the standard. It’s heat-resistant, durable, and safe for smoking.
Q4: Do I need a kiln to make a Sherlock pipe?
A: Yes – annealing in a kiln is essential. Without it, the glass will crack due to internal stress.
Q5: Is glassblowing dangerous?
A: Yes – it involves open flames, molten glass, and toxic fumes. Proper training and safety gear are mandatory.
Q6: Can I make a Sherlock pipe from wood instead?
A: Yes – wooden pipes are easier to make and don’t require a torch. But they require different skills (carving, drilling) and are not as durable as glass.
Q7: Where can I learn glassblowing?
A: Look for local glassblowing studios, community colleges, or online courses. Many studios offer beginner workshops.
Q8: Is it cheaper to make my own Sherlock pipe?
A: No – the equipment costs far more than buying a finished pipe. It’s only cheaper if you plan to make hundreds of pipes.
Q9: Can I sell pipes I make at home?
A: Only if you comply with local laws and regulations. Selling smoking accessories may require licenses and permits.
Q10: Where can I buy wholesale Sherlock pipes?
A: CloverGlass offers factory-direct pricing on glass Sherlock pipes in all popular sizes and styles. Low MOQ (12 pieces per style), fast LA warehouse shipping, and photo-to-credit warranty.
Conclusion + CTA
Making a Sherlock pipe is a rewarding craft for skilled glassblowers – but it’s not a beginner project. It requires expensive equipment, proper training, and a serious commitment to safety. For most people, buying a finished Sherlock pipe is the smarter, safer, and more cost-effective choice.
For individual smokers: If you want a custom Sherlock, buy from a reputable supplier and consider custom engraving or color options.
For smoke shop owners: Stocking wholesale Sherlock pipes from CloverGlass gives you consistent quality, low MOQs, and fast shipping – without the risk of making them yourself.
👉 Ready to stock wholesale Sherlock pipes? CloverGlass offers factory-direct pricing on glass Sherlock pipes, Sherlock bubblers, and heady Sherlocks. Low MOQ (12 pieces per style), fast LA warehouse shipping, and photo-to-credit warranty.
Get wholesale pricing: [Contact our B2B team]
Order online: https://cloverglasspipe.com/wholesale-sherlock-pipes/
Email Frank: Fr***@********pe.com